The short one line explanation of the workaround is to make the changes using the 'Printable Page' link, generate a 'Preview' or the entire PDF report, and then use the worksheet breadcrumb link to return to the worksheet. This ensures that the PDF changes you made are available during the sesion to the worksheet. You can always undo these settings by clicking the 'Revert to saved' link.
Let's see with an example, and lots and lots of screenshots!
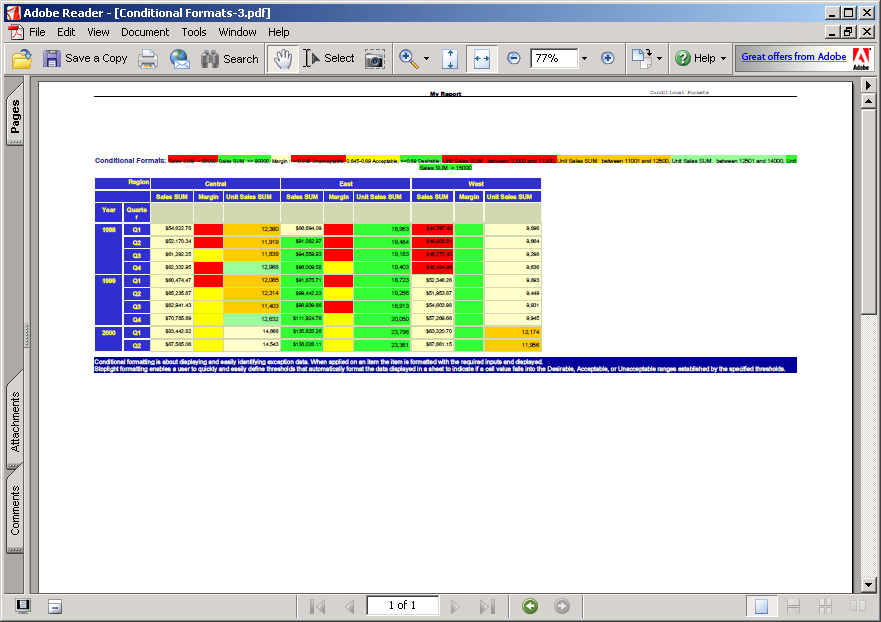
This is a slightly modified version of the 'New Features Examples' workbook that ships with Discoverer. As you can see, the worksheet is 'wide' - it has three measures, and three members of the geography dimension laid out on the row edge, resulting in nine columns of data.
 If I generate a printable PDF sample from this report, you will see, unsurprisingly, that the some columns of the report spill over to the second page.
 If I want to get them to fit on one page, I have a couple of options available. I could go to the 'Printable Page' screen, and change the paper orientation from 'Portrait' to 'Landscape', and also set a scaling factor of 50%.
With these settings, the resulting PDF generated (using the Printable Page option) now fits on a single page, width-wise. And as you can see, the text size also looks a lot smaller (should be 50% of the original size, but I have not tested that).
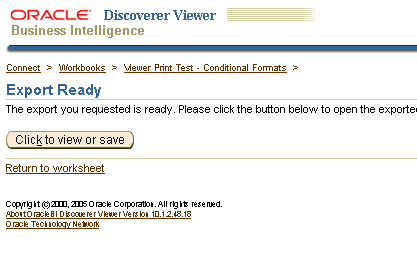
Now, click the worksheet link at the top of the page (Connect > Workbooks > Viewer Print Test - Conditional Formats > ) to return to the sheet. The PDF settings that you applied are now available within this session to the worksheet. Therefore, you can now click the 'Export' link and select PDF as the export format.
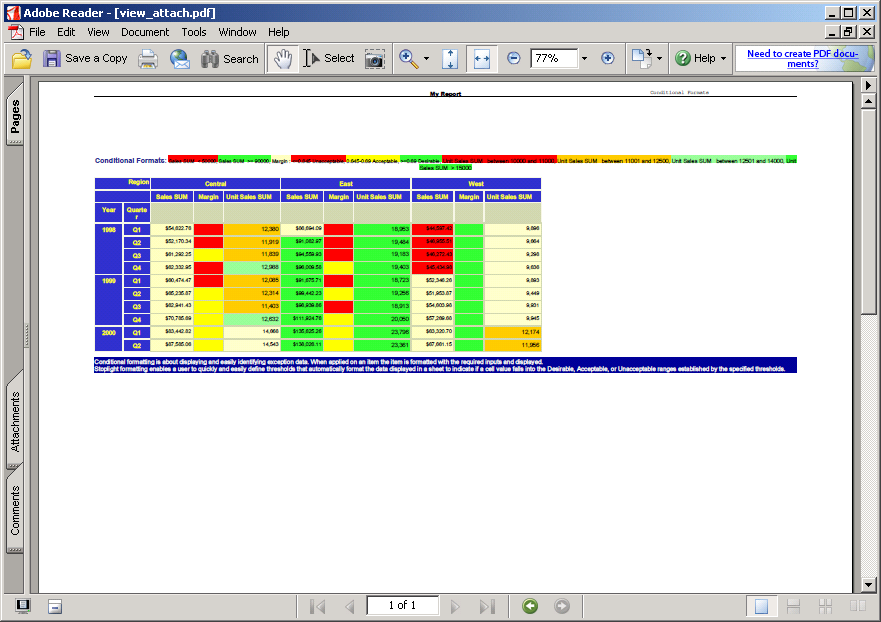
 The exported PDF file has the same settings applied: paper orientation as well as the scaling factor.
 You can also test this out with the email option; select PDF as the format to email the report as, and click the 'View attachment' button at the bottom of the 'Send Email' page.
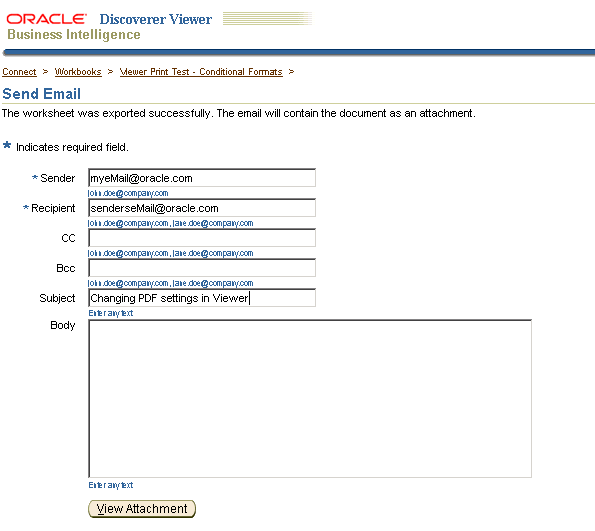
Voila! PDF settings are available here also!
You could close this worksheet, open another worksheet or even another workbook. So long as you don't exit Viewer and remain in the same session, the PDF settings that you applied earlier using the Printable Page options shall be available to the worksheet.